My first secondary was wound on 4-inch PVC SDR sewer and drain pipe. Following advice from the 'net, I cleaned and sanded it, and baked it for several hours, then sealed inside and outside with oil-based polyurethane. However, on all subsequent coils I no longer bother to bake and treat the inside surface with anything, as I now believe this to be unnecessary. It’s not clear that coating the outside of the finished coil has any electrical benefit, but it indisputably keeps the windings from shifting, looks nice, and may afford some degree of protection against mechanical damage. Water-based polyurethane flat-out won’t stick, so use the oil-based kind.
The most important detail in building a secondary coil is to NEVER drill a hole at the end of the winding and route the wire inside the tubing. Yes it will look nice and tidy, but internal arcing is almost certain to occur.
To wind it I fashioned a winding jig. I drilled a center hole in a pair of end-caps and ran a threaded rod through the length. One end of the rod was chucked into my VSR drill, the other rested on a stable support. The drill was forced ON, and the AC to the drill was fed through a Variac. For my first 4” coil I used #22 AWG enamel wire over a winding length of 23.25". The stable winding jig and Variac made things much easier, as did the assistance of my wife, unrolling the spool of wire and maintaining slack as I was guiding it onto the rotating form. Most importantly, the jig was essential in applying the numerous coats of polyurethane over the finished winding in a manor that prevented it from running and dripping as it dried. Note again that at neither end of the coil does the wire enter the interior of the tube.
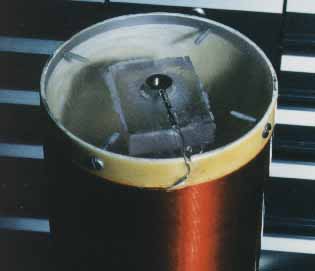
This is the base of my 4” secondary coil. A machinist friend machined two 1/2" thick Lexan disks for the end-plugs. In each, a brass 1/4-20 threaded insert was press-fit, and a wire soldered to it is recessed in a radial groove on the outside of the disk to connect each end of the secondary coil. The rectangular thing around the insert is a solid block of Lexan, epoxied to the inside of the disk to seal it and prevent internal arcing. Metal screws are perfectly acceptable to fasten the end-disks to the tube.
If Lexan disks are not an option, pine works too! I have turned a rough-cut 5/8” thick pine disk on my drill press (in lieu of a lathe), with a ¼-20 bolt through the center to the chuck. Apply a rasp file until the diameter is smooth and matches the ID of the tubing. In the center I press-fit and epoxied a ¼-20 steel hex threaded spacer, to which a short length of tinned wire, similar in gauge to the secondary winding, was soldered. The wire came out and lay in a radial groove in the outside of the disk, and is soldered to the end of the secondary winding. Again, a Lexan (or acrylic) insulator should be epoxied to the interior side of the disk to prevent arcing from the inside end of the spacer.
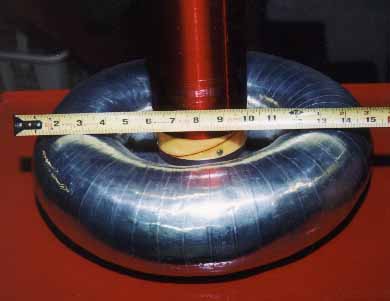
This is the top-end of my 4” secondary, with the smaller of my two toroids installed. Note that the top end of the secondary unwinds gradually, with no abrupt bends in the wire en route to the toroid.
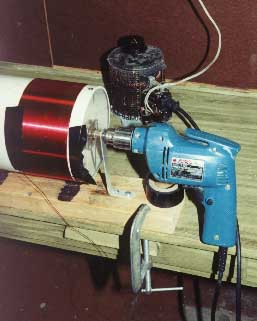
Above is my winding jig, this time with my 6" x 28" #22AWG secondary. My subsequent and better-performing secondary was same size but used #26AWG (more inductance is almost always a good thing). A small Variac to control the drill speed is in the background. Always make sure that a piece of tape is handy to secure the loose end. With this coil, I just placed the spool of wire on its end on the floor below the jig, and the wire just unspooled upwards by itself as I wound it, and this actually worked much better than having the reel unspool on a separate axle. Important: Keep the wire tension between your hand and the coil as tight as possible as you wind.